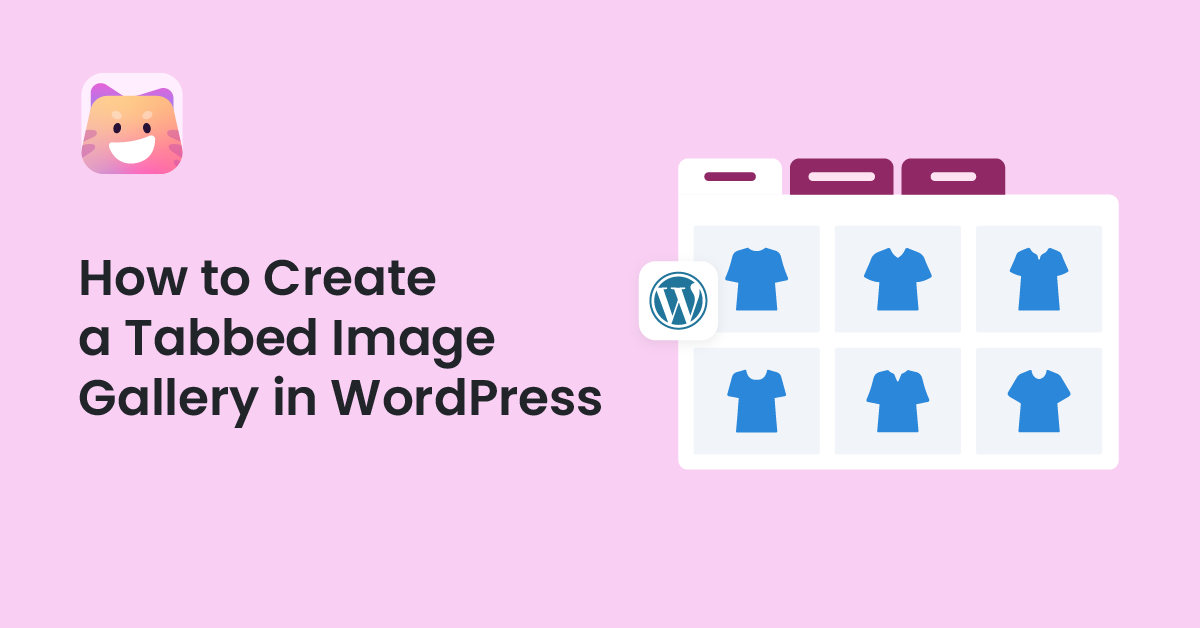
Creating a tabbed image gallery can be a great way to showcase your images in an organized manner to web visitors. It consists of a number of tabs or navigation buttons that allow users to switch and explore between different groups of images.
Whether you want to exhibit different types of products, portfolios, events, or project images, a tabbed image gallery can help you do it smartly. This article will provide a step-by-step guide on how to create a tabbed image gallery in WordPress.
Table of Contents
How to Create a Tabbed Image Gallery in WordPress: Step-by-Step Guide
There are numerous plugins online to create tabbed image galleries. Ultimate Blocks is one of the most popular and useful of them. This is actually a Gutenberg block plugin with 20+ powerful custom blocks.
It has a Tabbed Content by which you can create as many tabs as you want. Then, add the default Gallery tab inside them to create the tabbed image galleries on your website. Let’s explore how to do this.
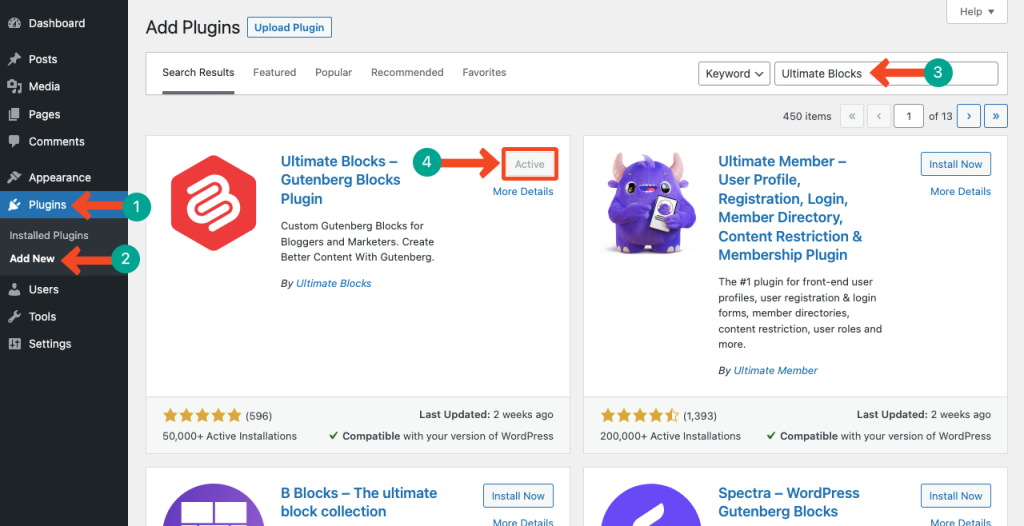
Step 01: Install and Activate the Ultimate Blocks Plugin
Get into your WordPress dashboard. Navigate to Plugins > Add New. Type Ultimate Blocks in the search box. Install and activate the plugin once it appears below.
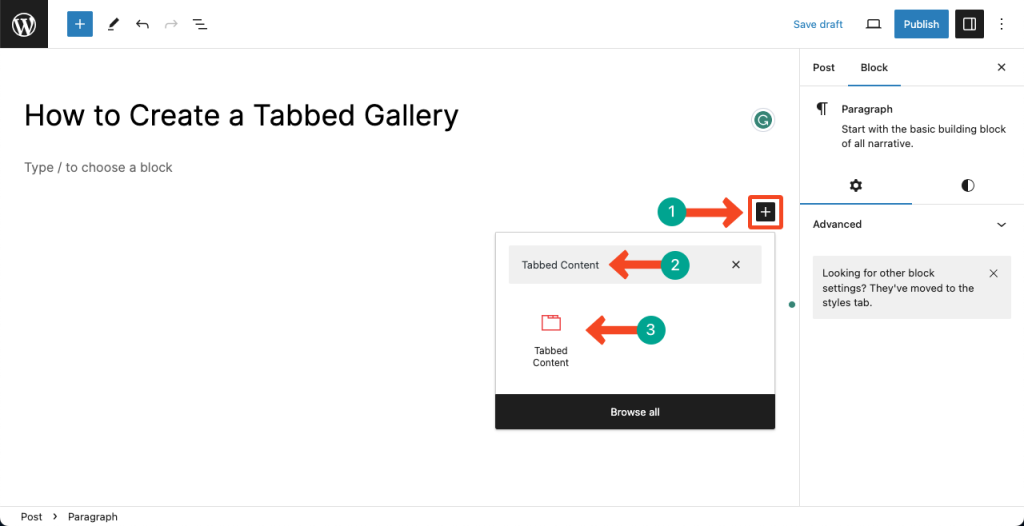
Step 02: Add the Tabbed Content Block
Open your desired post/page where you want to create a tabbed gallery. Press the Hit (+) icon. Type Tabbed Content in the search box. Press the block after it appears below.
Step 03: Create As Many Tabs As You Want
By clicking the Plus (+) sign on the Tabbed Content block, you can increase as many blocks as you want.
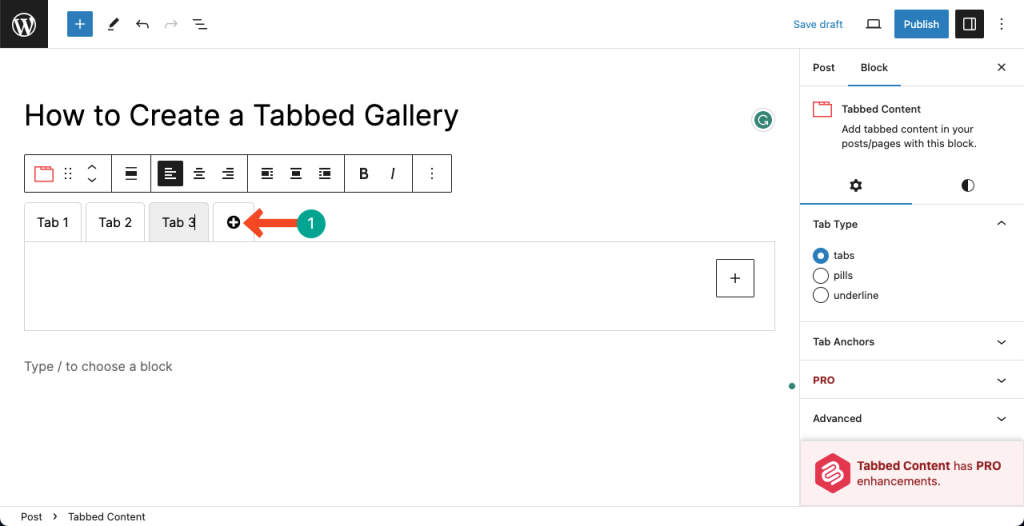
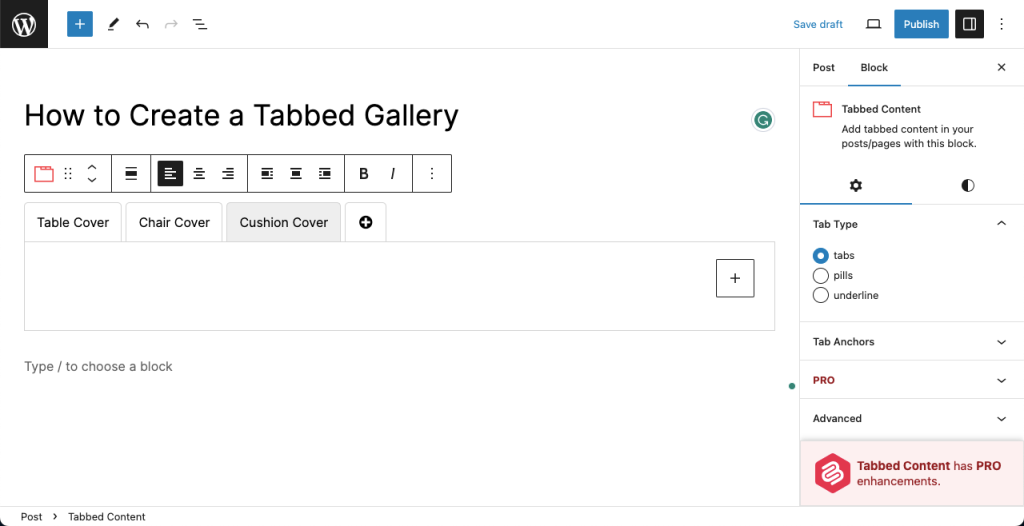
You can also rename the tabs. Take your cursor and click on the respective tabs, you’ll get the way to rename them.
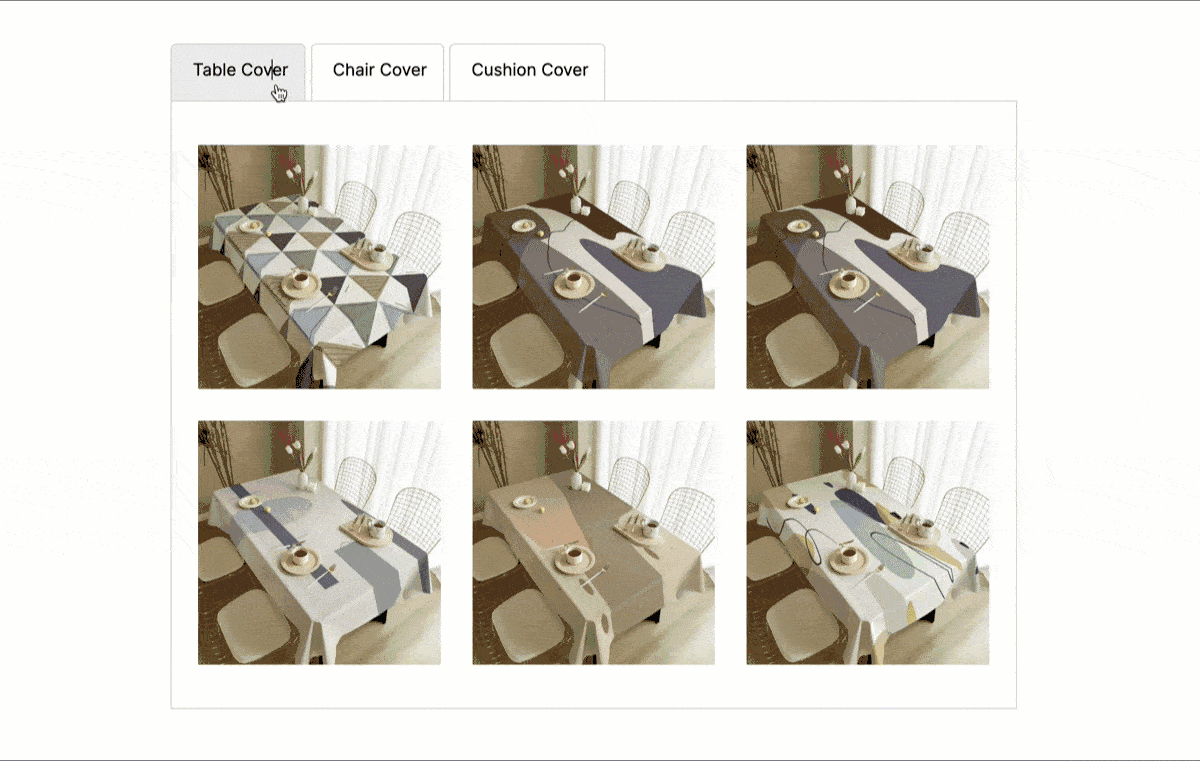
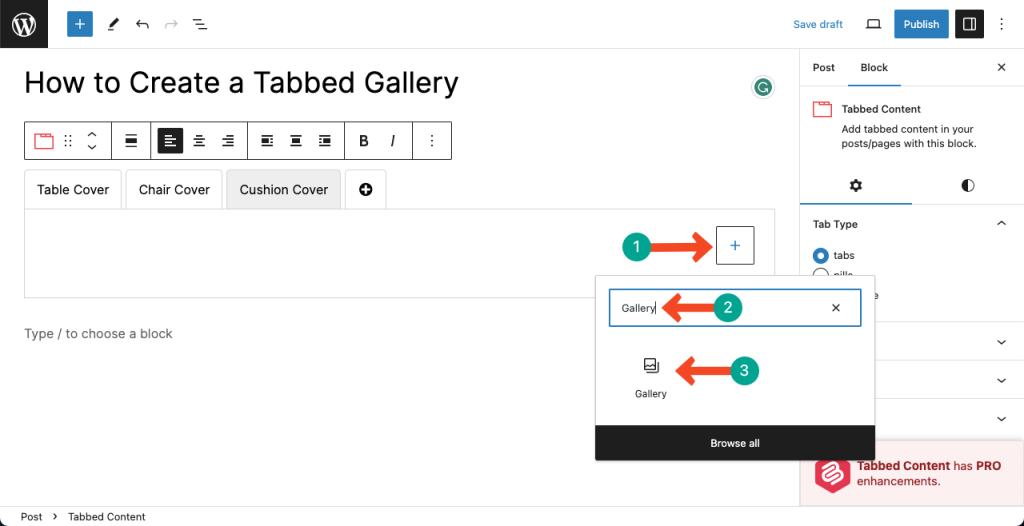
Step 04: Add the Gallery Block Inside the Tabbed Content Block Tabs
You’ll see a Plus (+) icon inside every tab you create with the Tabbed Content block. Hitting the plus icon will open the Gutenberg editor. Type Gallery in its search box. Press the Gallery block after it appears below.
Use the Upload button to add images from your local drive. Use the Media Library option if you have the necessary images in your media file section.
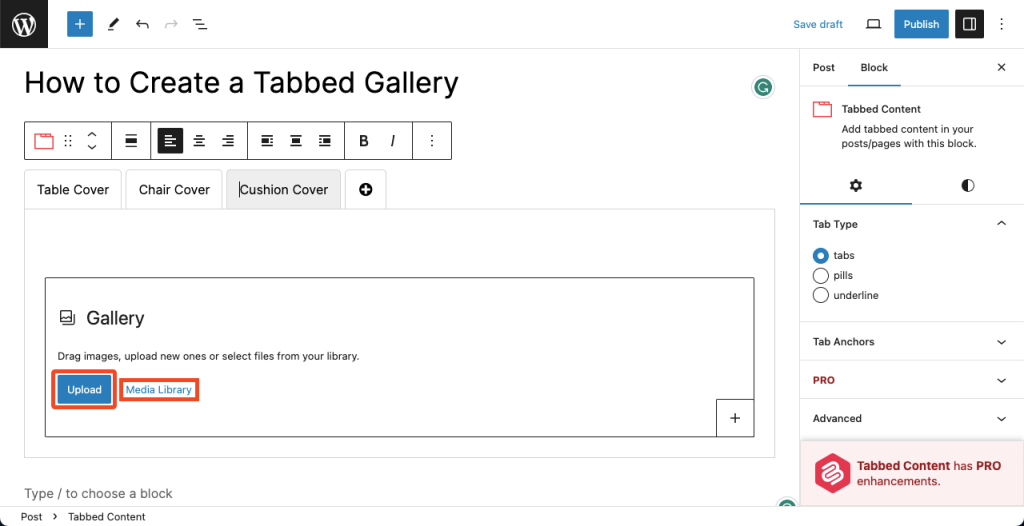
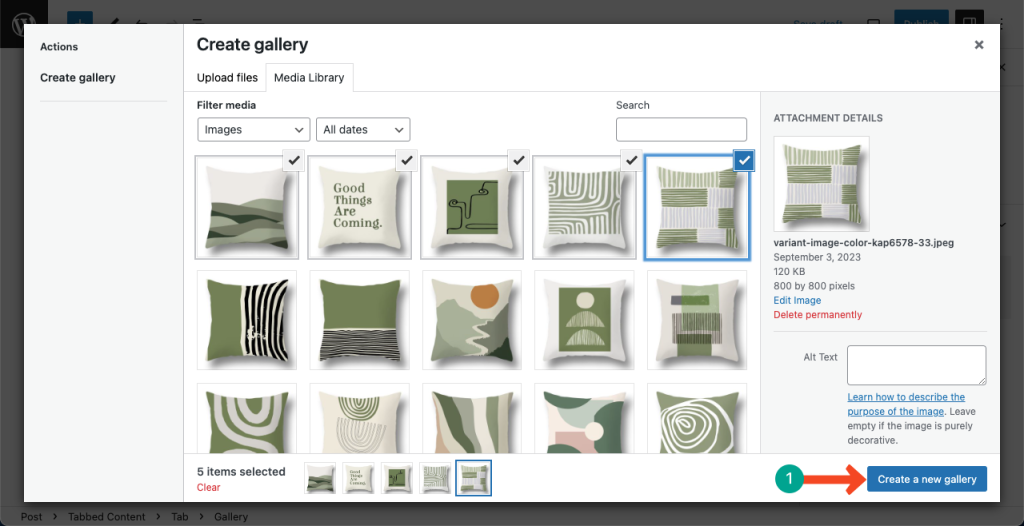
As our desired images are already existing in the media file section, we have used the Media Library option.
Select the images you want to show on the tab. Press the Create a new gallery button.
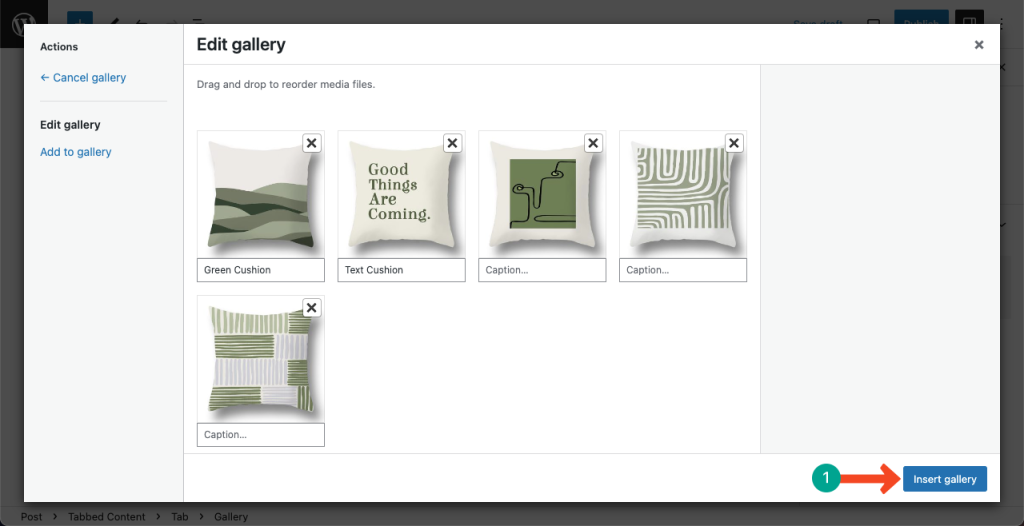
You’ll be allowed to add a caption for each image on the gallery. Add a relevant caption or leave them as they are. Finally, hit the Insert gallery button.
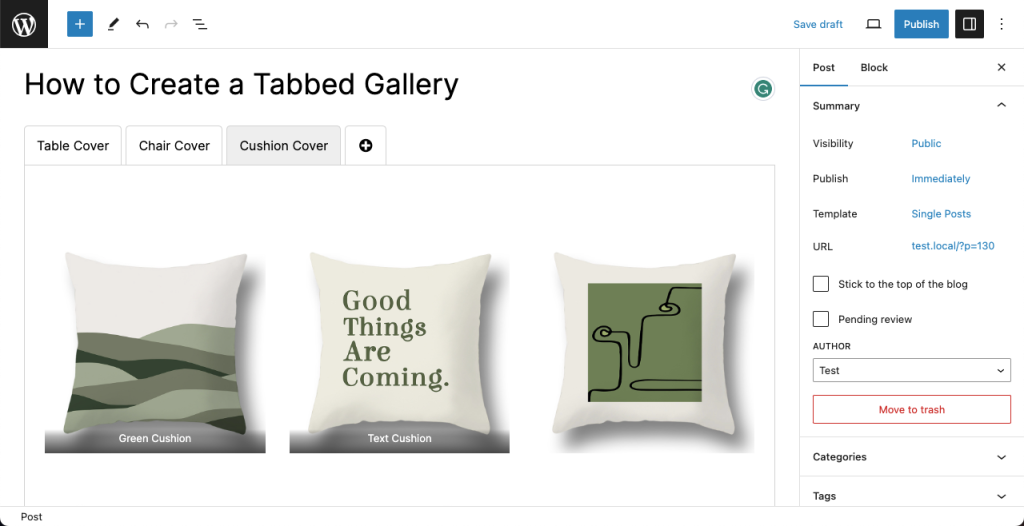
Thus, the tabbed image gallery on your WordPress site will be created.
Sum Up
Images and visuals can engage audiences better than flat texts and paragraphs. If you can present the images of your product, service, and project images smartly, it can help you generate sales and conversions.
Tabbed galleries can assist you a lot in this case. Hope you have benefitted from this article. It’s now the time to create your tabbed image galleries. Best wishes from us.