If your WordPress has got a lot of media files, the only way you can manage them properly is by using a good naming convention.
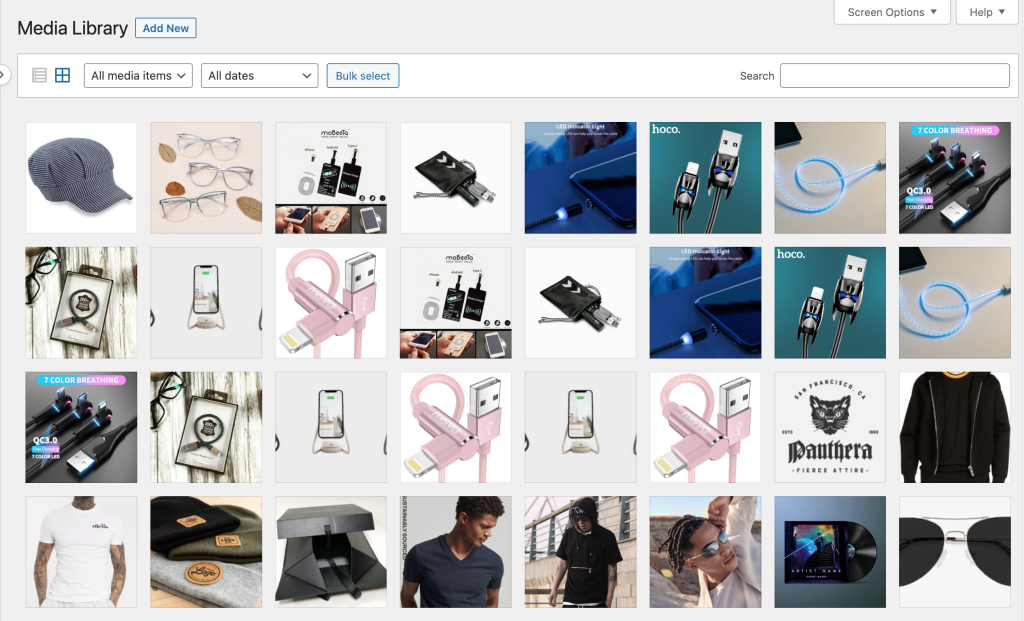
By default, WordPress does not provide any method to create folders in the WordPress media library, or categorize those existing media files. So, you do not have any solution on hand to categorize the media files, nor do you have the ability of bulk operations on WordPress media files.
You can see how the default media page looks in your WordPress admin. It’s a clutter of files of all types all together, adding up day by day.
Do you ever wish you could put all the media files in categories and sub-categories while you can sort them by name, file size, and so on? Then, this article is for you!
Here’s the expected result. As you can see, all those images describing the “iPhone case” products are neatly categorized into a nested folder.
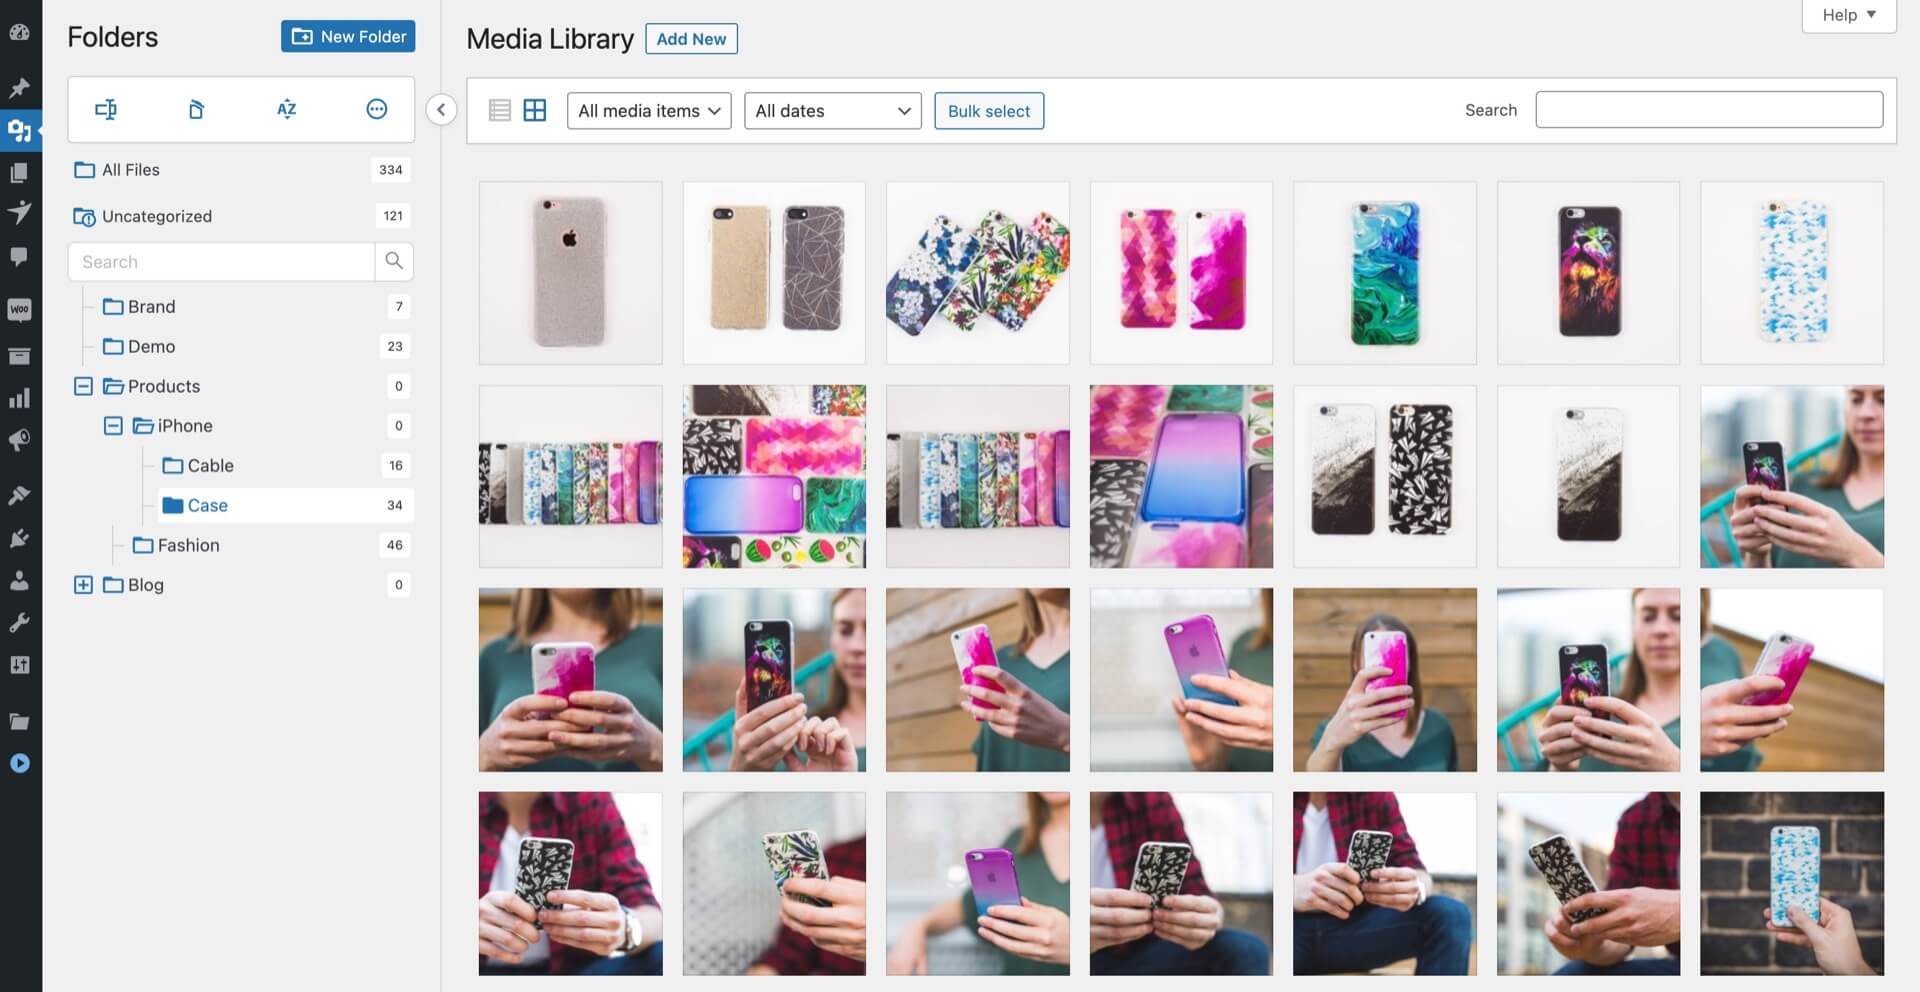
With a folder tree system integrated into the WordPress media library, you now have a way to categorize them as you wish. Let’s dive in and see how we can make it happen!
Table of Contents
If you need to find out a particular image, then you might have to browse all images or you have to know the name of the image to carry out a search.
To overcome the above-mentioned issues, you can use a WordPress plugin. CatFolders is one of the best WordPress plugins to organize and manage your media files. This plugin is user-friendly and very easy to use to manage your media library.
Best Plugin to Create Folders in WordPress Media Library
CatFolders WP plugin has got the following features in a nutshell:
- Categorize all media files
- Easy to find media files
- Very fast and responsive
- Simply drag and drop operations
- Smart operations on media files
- Improve your productivity when managing media files
- Download media file with folder structure
1. Install CatFolders Plugin
First, you can download the CatFolders plugin from the WordPress repository. Alternatively, you can install it directly from the Plugins menu.
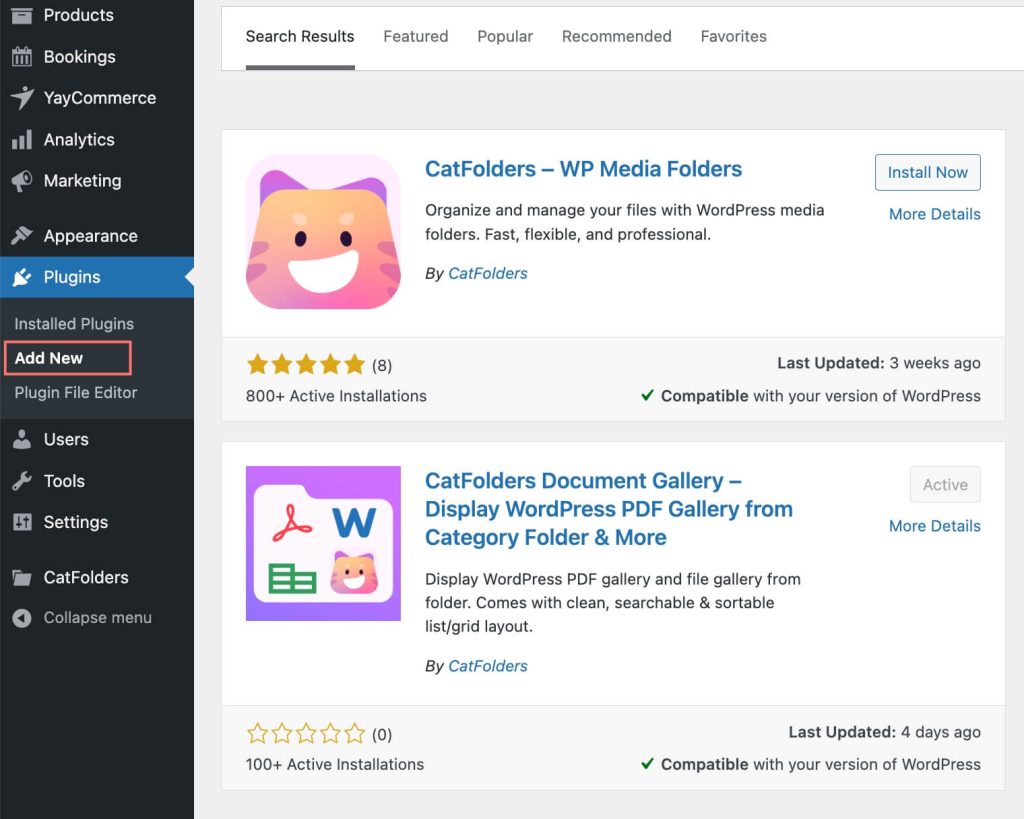
In case you download the file from the server you can install it on your WordPress website. In your WordPress admin, go to Plugins > Add New to add a new plugin.
Then browse the zip file you downloaded and click on it to install and activate the plugin. The installation process is very straightforward and what you need is just the zip file of the plugin.
Note: If you want to use the PRO version then you have to purchase the plugin and then you can get the license code for it. The paid version is required if you want to create sub-folders and get the premium support service from the plugin developers.
General settings
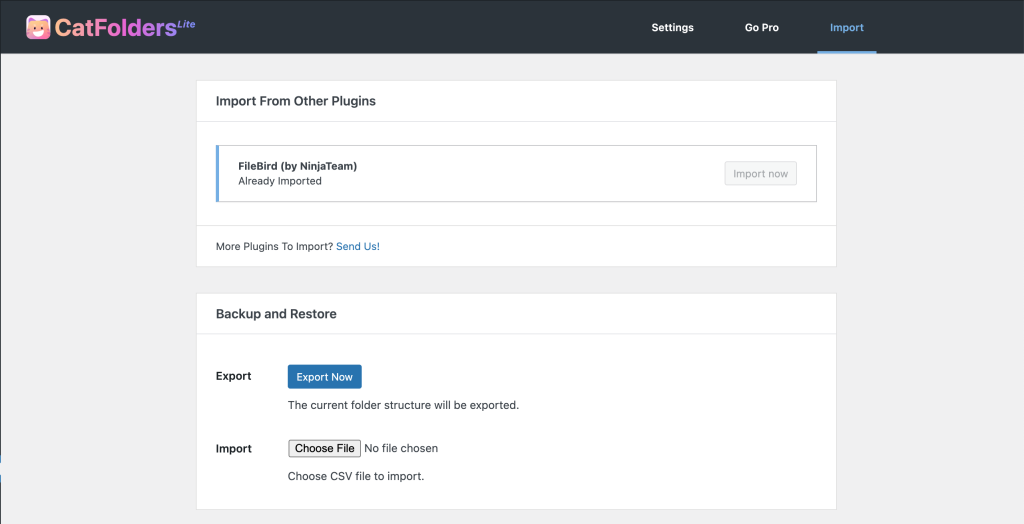
Once you’ve activated the plugin you will be directed to the homepage of the plugin and you can configure the CatFolders plugin. You can see three tabs called Setting, License, and Import.

The Import tab allows you to import and export the folder structure. This is very important when you migrate WordPress websites.
Media library
Now, visit WordPress Media → Library. This is where you can view the media page once you install the CatFolders. All images are under the Uncategorized category at the start.
Now let’s see how to manage your media files using CatFolders.
Please note that the categories you create on this page are only virtual folders and it does not have any relationship with the categories of the WordPress posts.
2. Set Startup Folder to Categorize Media Files
You can set the startup folder which is the active folder when you open the media library. By default startup folder is Uncategorized.
You have the following options to select
- Previous folder selected
- All files
- Uncategorized
- Specific File
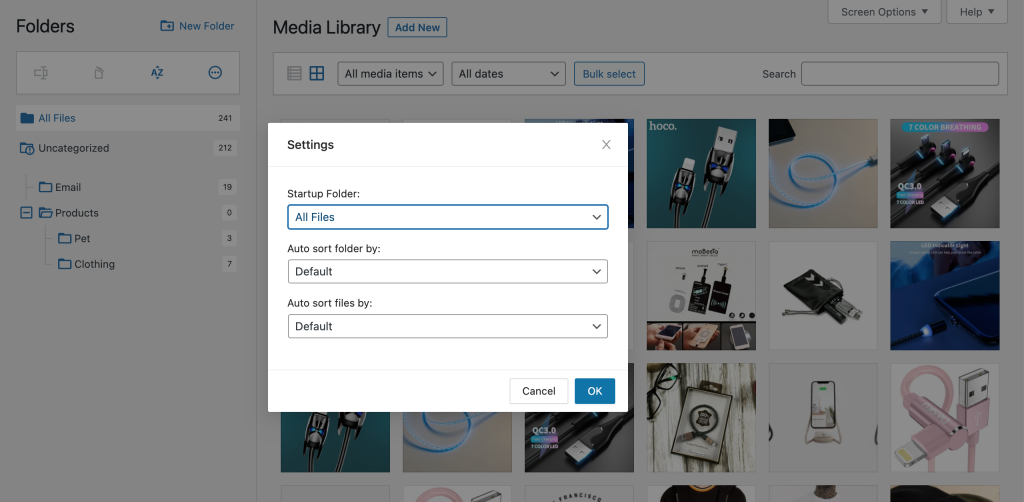
In addition to the startup folder you can set the Auto Sort Files by and Auto Sort Files by
3. Create Folders in WordPress Media Library
Creating a folder on the media file page is very simple and you have the New Folder icon located at the top of the page.
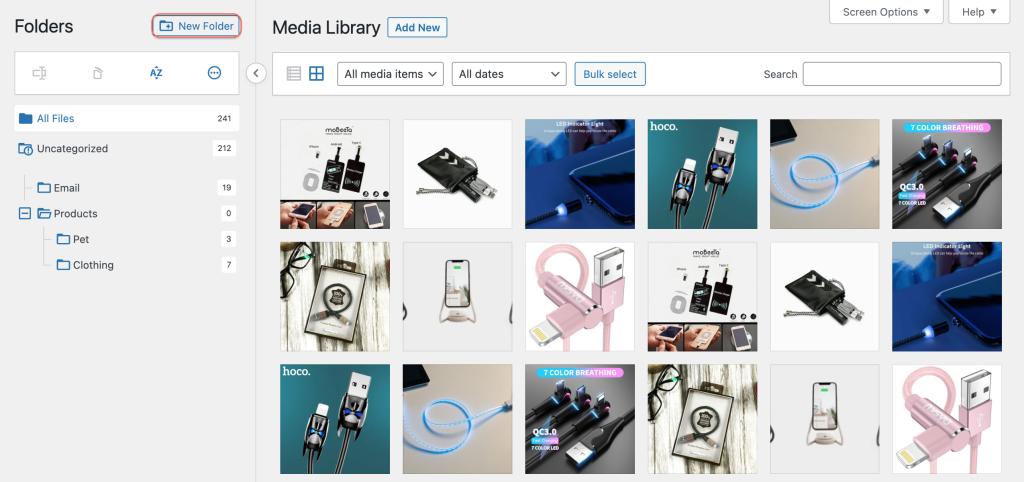
If you do not select any folder of the folder tree it will create the folder at the top level and if you want to create a subfolder then you have to select the parent folder.
Once you click the New Folder icon, you can enter and save a name for the folder.
To rename and delete a folder, you can right-click on the folder and it will give you the popup menu with options delete and rename.
When you delete a folder, media files inside the folder will not be deleted.
4. Categorize your WordPress Media Files
You can categorize the existing media files and you can add new media files directly into the folder.
To categorize existing media files, you can drag and drop the media file into the folder. CatFolders plugin allows you to select multiple thumbnails too.
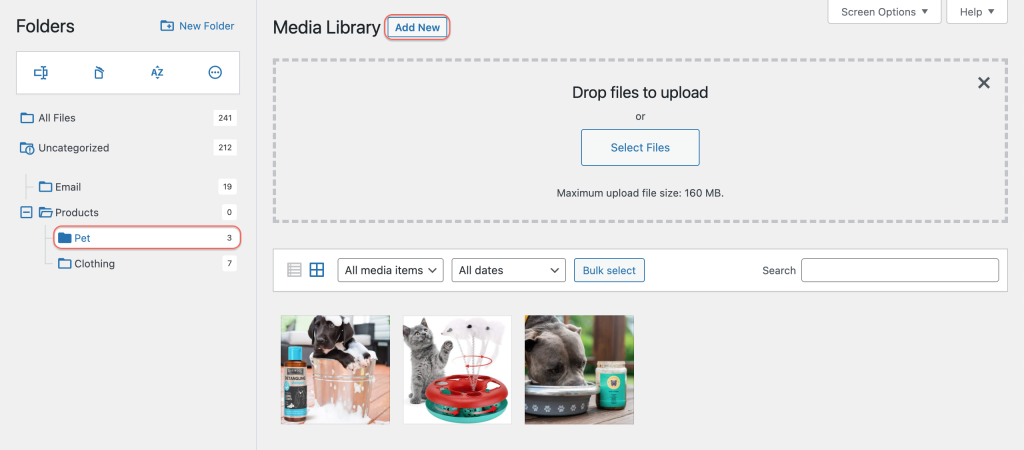
You can add a new media file inside the folder by selecting the target folder and then clicking on the Add New button to add new media. Once the uploading is completed it will be placed inside the selected folder.
Smart context menu
There are several operations you can do with categories, such as bulk select, rename folders, delete folders, and sorting. With a single right-click on a folder, you can see the contextual menu with operations as shown in the image below.
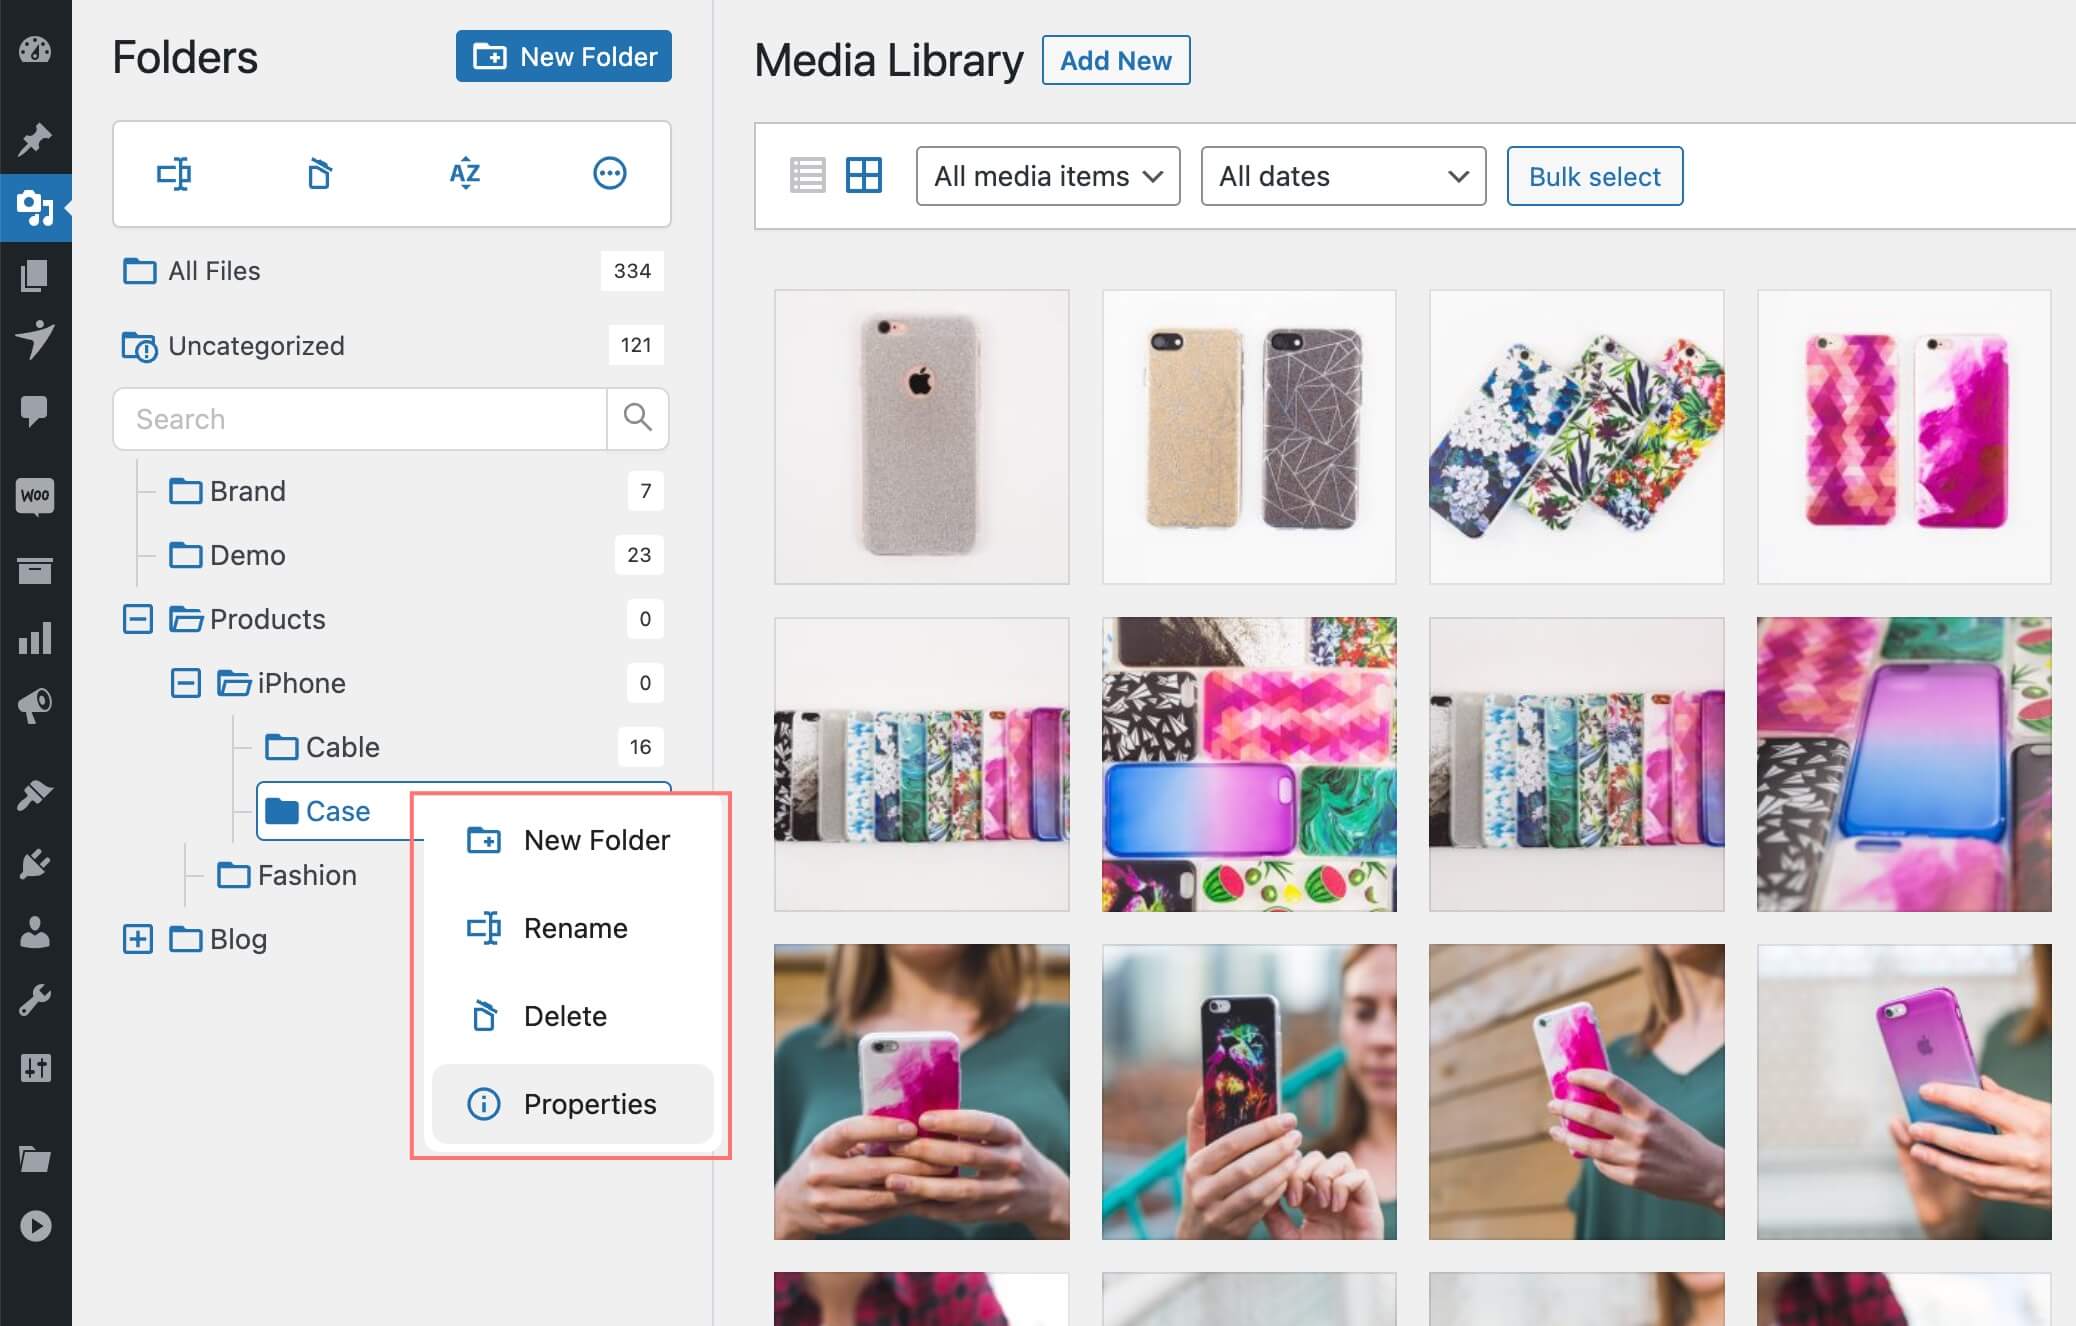
Once you select the folder from the folder tree you can do one of the operations on the selected folder.
Bulk selection of media files
This is a very useful function when you have a large set of files you can select several files and move them to the folders.
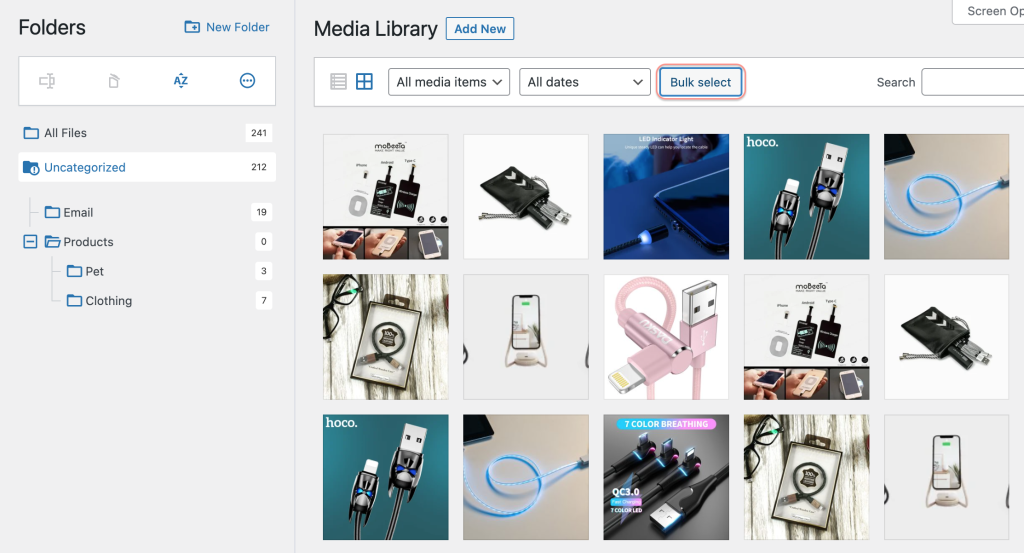
You can see the Bulk Select button top of the media panel. If you want to select several files and move to one of the folders of the left panel first you click the Bulk Select button and then click on the thumbnails to select files.
After that, you can drag and drop them to the desired folder in the folder tree.
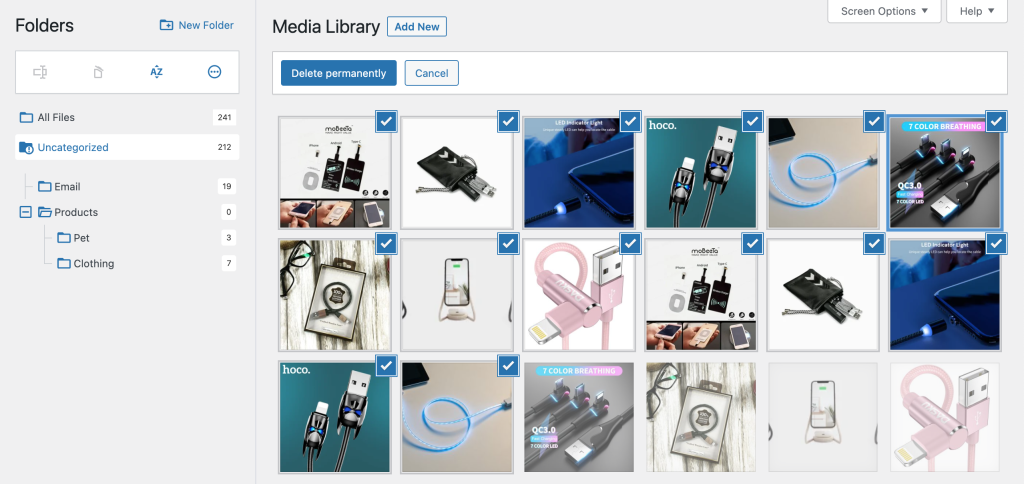
Bulk selection of media folders
In addition to the bulk file selection, you have the ability to select multiple folders in bulk. This is useful when you want to delete several folders at once.
You have learned how to make organizing WordPress media files a breeze. Categorizing images into galleries not only helps with managing files from the backend but also saves time when presenting well-organized images to your website’s frontend.
Bonus: How to Add WordPress Image Gallery
In this next section, we’ll share a tip that can help you take full advantage of CatFolders to create a beautiful image gallery for your posts/pages.
Step 1: Add a New Block
To get started, look for the CatFolders Image Gallery block. It’s a pre-built block that comes with some awesome design elements.
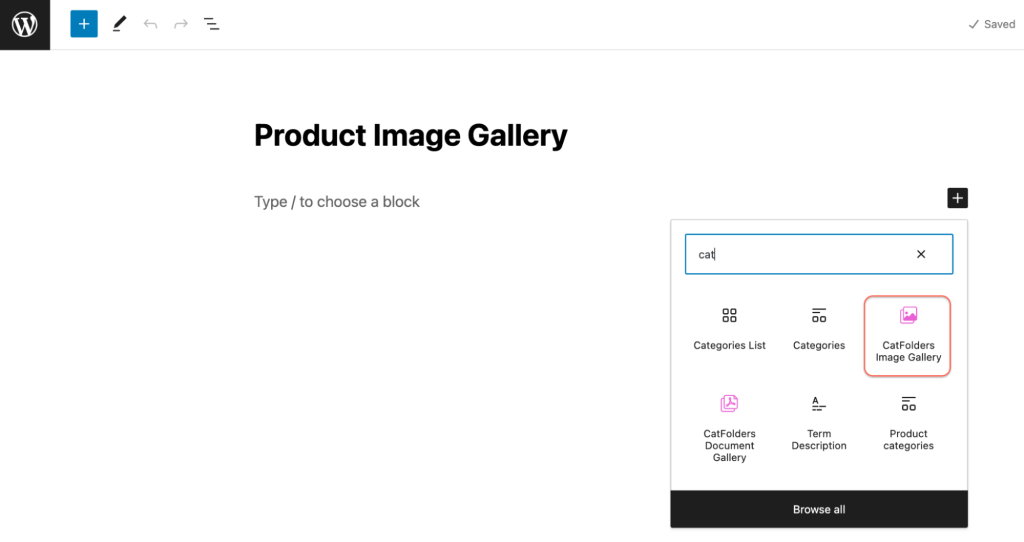
In the block options sidebar, you’ll see a select box where you can choose specific folders to output their files.
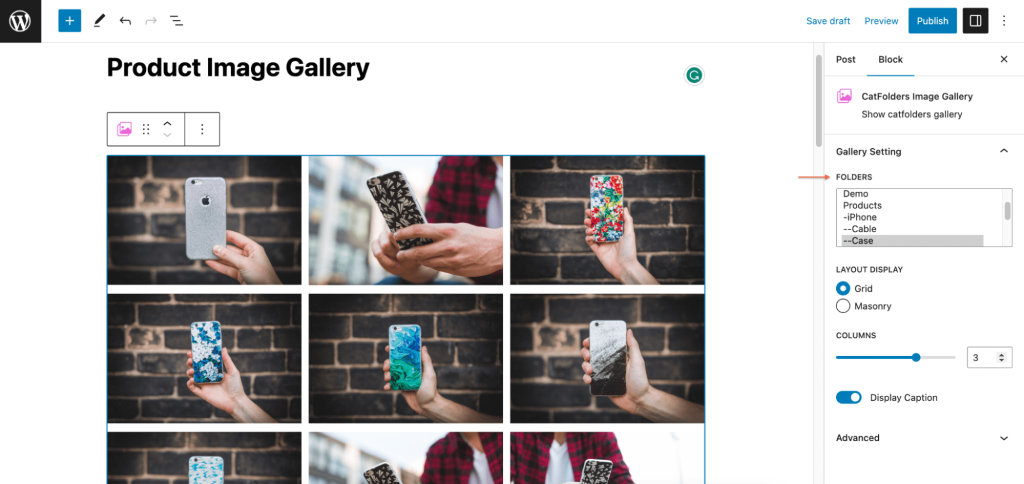
Step 2: Format the Image Gallery block to your liking
First, choose between a grid or masonry layout and decide on how many columns you’d like to display. You can even choose whether to display captions when hovering over the images. If you want to add a CSS class, go for it!
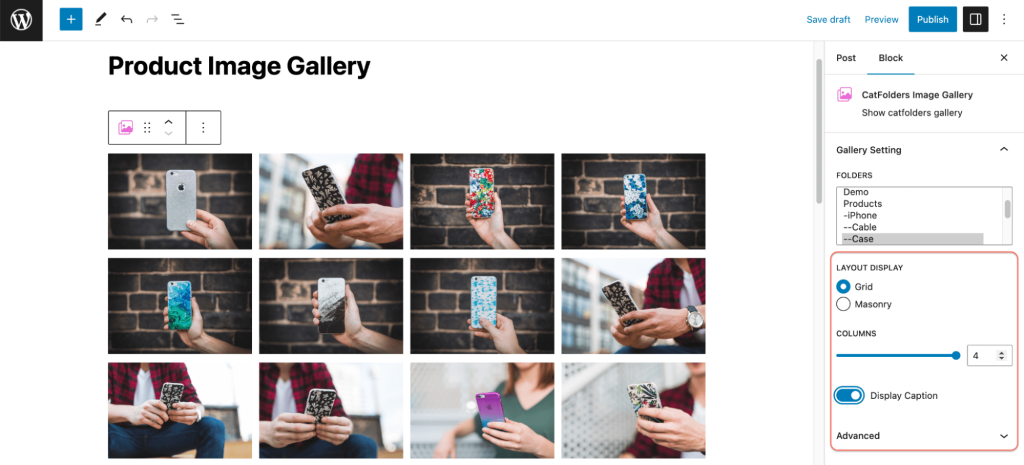
Step 3: Publish Your Awesome Creation
The best part is that you can see your changes in real-time right in the Gutenberg editor. When you’re happy with how it looks, simply hit “publish” and take a look at your amazing page/post!
Pro Tips
To get a folder of documents published on a WordPress page, check this add-on out: CatFolders Document Gallery
Conclusion
CatFolders WordPress plugin provides you the facility to create folders in WordPress media library and manage it in an effective manner. This plugin comes with built-in features to categorize your media files and also it has got functions to do bulk operations on media files. You can enjoy the drag-and-drop feature as well as the filtering and sorting of media files.
You can refer to the full tutorial on how to use CatFolders in the documentation here.
FAQ on How to Create Folders in WordPress Media Library
How do I organize my WordPress files in media library folders?
With CatFolders, you can easily perform various tasks on your files to keep them organized. This includes drag-and-drop functionality for multiple files, the ability to work with both grid and list views, and sorting options by file name, creation date, modification date, author, newest or oldest, and more.
How can I categorize WordPress media files?
CatFolders enables you to easily categorize your media files in any convenient way. You can select an existing file or choose multiple files to drag and drop into the desired folder.
Alternatively, you can categorize your files correctly right when you first upload them by choosing specific folders that will contain files.
Can I import the WordPress folder from other platforms?
Yes, with CatFolders, you can easily import your existing folder structure with just one click. Once imported, you will be able to access your familiar categories in a user-friendly CatFolders format.
Can I organize folders in the WordPress media library?
To organize your media folders in WordPress, you can create subfolders to better organize your folder tree. You also have the ability to rename folders, bulk select them, sort them, and search for specific folders by name.
Additionally, you can enable a global folder structure that allows everyone to see the same categorization, or set folder permissions based on user roles. These features can be easily achieved with the help of CatFolders.
